
Making wax melts is a fun craft. It's simple too. You melt the wax, add scents, and cool it in shapes. Silicone molds make it better. They let you create many designs. From flowers to stars, anything is possible.
This craft is not just about making something smell nice. It's also about making something beautiful. And the best part? You do it your way. You choose the scents. You pick the colors. Every melt reflects your style.
People love making wax melts. They enjoy the creativity. They enjoy the personal touch. And they enjoy sharing their creations. With silicone molds, the process is easy and fun. This guide will show you how. Let's start this creative journey together.
Understanding Wax Melts

Let's find out what actual wax melts are and how they are beneficial for us.
What Are Wax Melts?
Wax melts are pieces of scented wax. You don't burn them like candles. Instead, you melt them in a warmer. This releases their scent. They come in many shapes and sizes. Each piece fills a room with aroma.
You use them by placing a melt in a warmer. Then, you heat it. This can be with a tea light or electricity. The wax melts, and the scent spreads. It's a safe way to make a place smell good. No flame means less risk.
Benefits of Homemade Wax Melts
- Making wax melts at home has perks. First, you control what goes in them. You pick the wax and the scents. This means you can avoid chemicals found in store-bought ones. It's better for you and the environment.
- Customization is another benefit. You can mix scents. You can make unique shapes. Your wax melts can match any mood or season. This makes them great for personal use or gifts.
- Homemade wax melts are eco-friendly. You can choose natural waxes like soy. These are better for the planet. They also burn cleaners. This means healthier air in your home.
- Making your wax melts is also fun. It's a hobby that lets you be creative. You can experiment with colors and scents. Every batch can be a new adventure.
Choosing the Right Materials
Let's explore what are the key aspects of choosing the best wax for the making process.
Selecting the Wax
There are many waxes. But soy wax stands out. It's natural. It comes from soybeans. This makes it eco-friendly. It's renewable too.
- Soy wax melts at a low temperature. This means it releases scent slowly. It makes the scent last longer. Soy wax also holds fragrance well. It can mix with many scents. This gives you more options for customizing.
- Other waxes like paraffin are common. But they are not as green. Paraffin comes from petroleum. It's not renewable. It can also release harmful chemicals when melted.
- Beeswax is another choice. It's natural and burns clean. But, it's more expensive. It also has a natural scent. This can be mixed with the scents you add.
- Soy wax is often the best choice. It's safe, green, and works well for melts.
The Importance of Silicone Molds
- Silicone molds are key for wax melts. They are flexible. This makes removing the wax easy. You won't break the melts. This is hard with rigid molds.
- Silicone can handle heat and cold. You can use them many times. They last long. This makes them a good investment.
- They come in many shapes and sizes. You can make melts for any occasion. From simple cubes to intricate designs, silicone molds offer variety.
- Cleaning them is easy too. Soap and water are all you need. This saves time.
- Silicone molds for wax melts are safe. They don't release harmful chemicals. This keeps your workspace and air clean.
The Making Process
Let's look into the journey of making the silicone wax melt molds in detail.
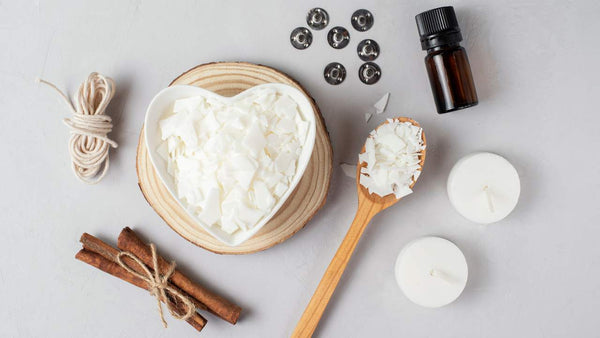
Preparing Your Workspace
- A good workspace is key. It should be clean and tidy. Make sure you have space. You need room to work.
- Put everything you need close by. This saves time. It keeps things smooth. Use a heat-resistant surface. Wax can spill. It's hot. A heat-resistant surface protects your table.
- Keep your tools ready. Have molds, wax, scents, and dyes out. A digital scale is useful. It makes measuring accurate.
- Safety is important. Wear gloves. Wax gets hot. Gloves protect your hands.
Step-by-Step Guide to Making Wax Melts
- Measure the Wax: Use a scale. You want the right amount. For six melts, 200g of soy wax is good.
- Melt the Wax: You can use a double boiler or a microwave. Keep an eye on it. Stir it sometimes. This helps it melt evenly.
- Add Color: Once melted, add dye. Start with a little. You can always add more. Stir well.
- Add Scent: Let the wax cool a bit. Then, add fragrance oil. How much is up to you. Mix it well.
- Pour the Wax: Now, pour the wax into your molds. Do it slowly. This helps avoid air bubbles.
- Let it Cool: Wait until the wax is firm. It takes time. Don't rush it.
Cooling and Removing Wax Melts
- Letting your melts cool is crucial. It can take a few hours. Room temperature is best. Don't try to speed it up. Fast cooling can crack the wax.
- Once cool, removing them is easy. Silicone molds are flexible. Gently push the bottom of each cavity. The wax melt should pop out. If it sticks, wait a bit longer. Then try again.
- If the melt is stubborn, put the mold in the fridge. Just for a few minutes. This can help. But don't leave it too long. Too cold can make the wax crack.
- Cooling and removing carefully keeps your melts nice. It keeps their shape and scent good. Now, you're ready to enjoy or share your homemade wax melts.
Troubleshooting Common Issues
While making silicone wax melt molds, there can originate some minor issues. Let's discuss what are these and how we can fix them.
Preventing Wax Melts from Sticking
- To avoid sticking, keep molds clean. Before you start, check them. They should be dry and dust-free.
- A light spray can help. Use a mold-release spray. But just a little. Too much affects the finish.
- Cool wax melts fully. Rushing causes sticking. Patience is key. If they stick, try the fridge trick. A few minutes can make a difference.
- Fixing Imperfect Melts
- For uneven scent, mix well. Add fragrance at the right temperature. Too hot, and it evaporates. Too cool, and it doesn't mix.
- If the color is uneven, stir more. Add color slowly. Mix it in well before adding more.
Creative Ideas for Wax Melt Designs
Let's find out how can we make the wax melt molds more appealing.
Exploring Shapes and Colors
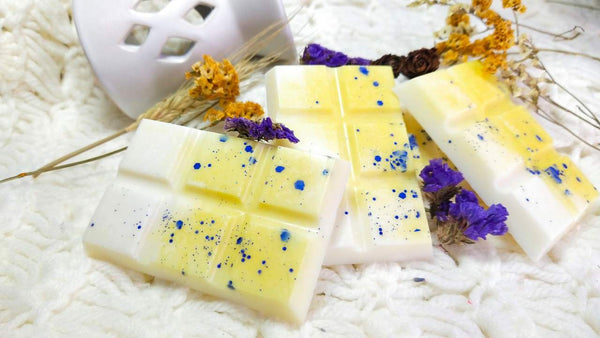
- Try new shapes. Use different molds. Hearts, stars, or flowers are fun. They make your melts special.
- Play with colors. Mix dyes to get new shades. Pastels are soft and pretty. Bright colors make bold melts. Match colors to scents. Like yellow for lemon.
- Layer colors. Pour one color. Let it set. Then add another. This makes cool effects.
- Fragrance Combinations
- Mix scents. Start with two. Like lavender and vanilla. It's calming. Or try mint and chocolate. It's refreshing.
- Think of seasons. Cinnamon and apple for fall. Pine and cedar for winter. These bring the season inside.
- Use your favorites. Make scents that make you happy. There's no wrong mix.
FAQ
How to make molds for candles?
To make candle molds, first choose your candle's shape and prepare a model. Coat complex models with a release agent. Place the model in a box, then mix and pour silicone rubber over it. After the silicone cures, remove the mold and model. Now, your mold is ready for making candles.
How long to leave wax melts in mold?
After making wax melts, let them cool. They need a few hours. Cool at room temperature. This prevents cracks. Cooling slowly is key. It ensures they set well. Check after 2-3 hours. They should be firm. If not, give them more time. Patience is important for good results.
How do I decide how much fragrance oil to use in my wax melts?
For every 200 grams of wax, adding about 10-15 drops of fragrance oil is a good starting point. However, you can adjust this based on personal preference. If you enjoy stronger scents, feel free to add more. For subtler scents, use less.
Over time, do wax melts lose their fragrance? How long do they last?
Yes, the intensity of the fragrance in wax melts will decrease with use. Typically, wax melts can retain their scent for several uses, but this can vary depending on the type of wax and the amount of fragrance oil used. To enjoy the best scent throw, use your melts within a year of making them.
Can I combine different fragrance oils to create custom scents for my wax melts?
Definitely! Combining fragrance oils allows you to create personalized scents. Experiment with blending complementary scents to discover unique combinations. For example, mixing floral and citrus notes can produce fresh, uplifting aromas.
Conclusion
Making wax melts is fun. It lets you be creative. You choose the shapes, colors, and scents. Each melt is unique. It's yours. Homemade melts are better. They are safe and natural. You know what's in them. They make your space smell good.
Try new things. Mix scents. Play with colors. Use different molds. There's no limit. Your next favorite scent or design is out there. Enjoy the process. Share your creations. Wax melts are small joys. They make life brighter. Start making yours today.
Share your wax melt creations with us. Got tips? Tell us. Visit our website for materials. Find inspiration there too. Let's make beautiful things together. Start now.